

Help Getting started
Upload your world
BedrockMap needs a copy of your world as one file. Here's how to get it from wherever your world lives, and how to upload it.
Getting your world file
Bedrock, on Windows
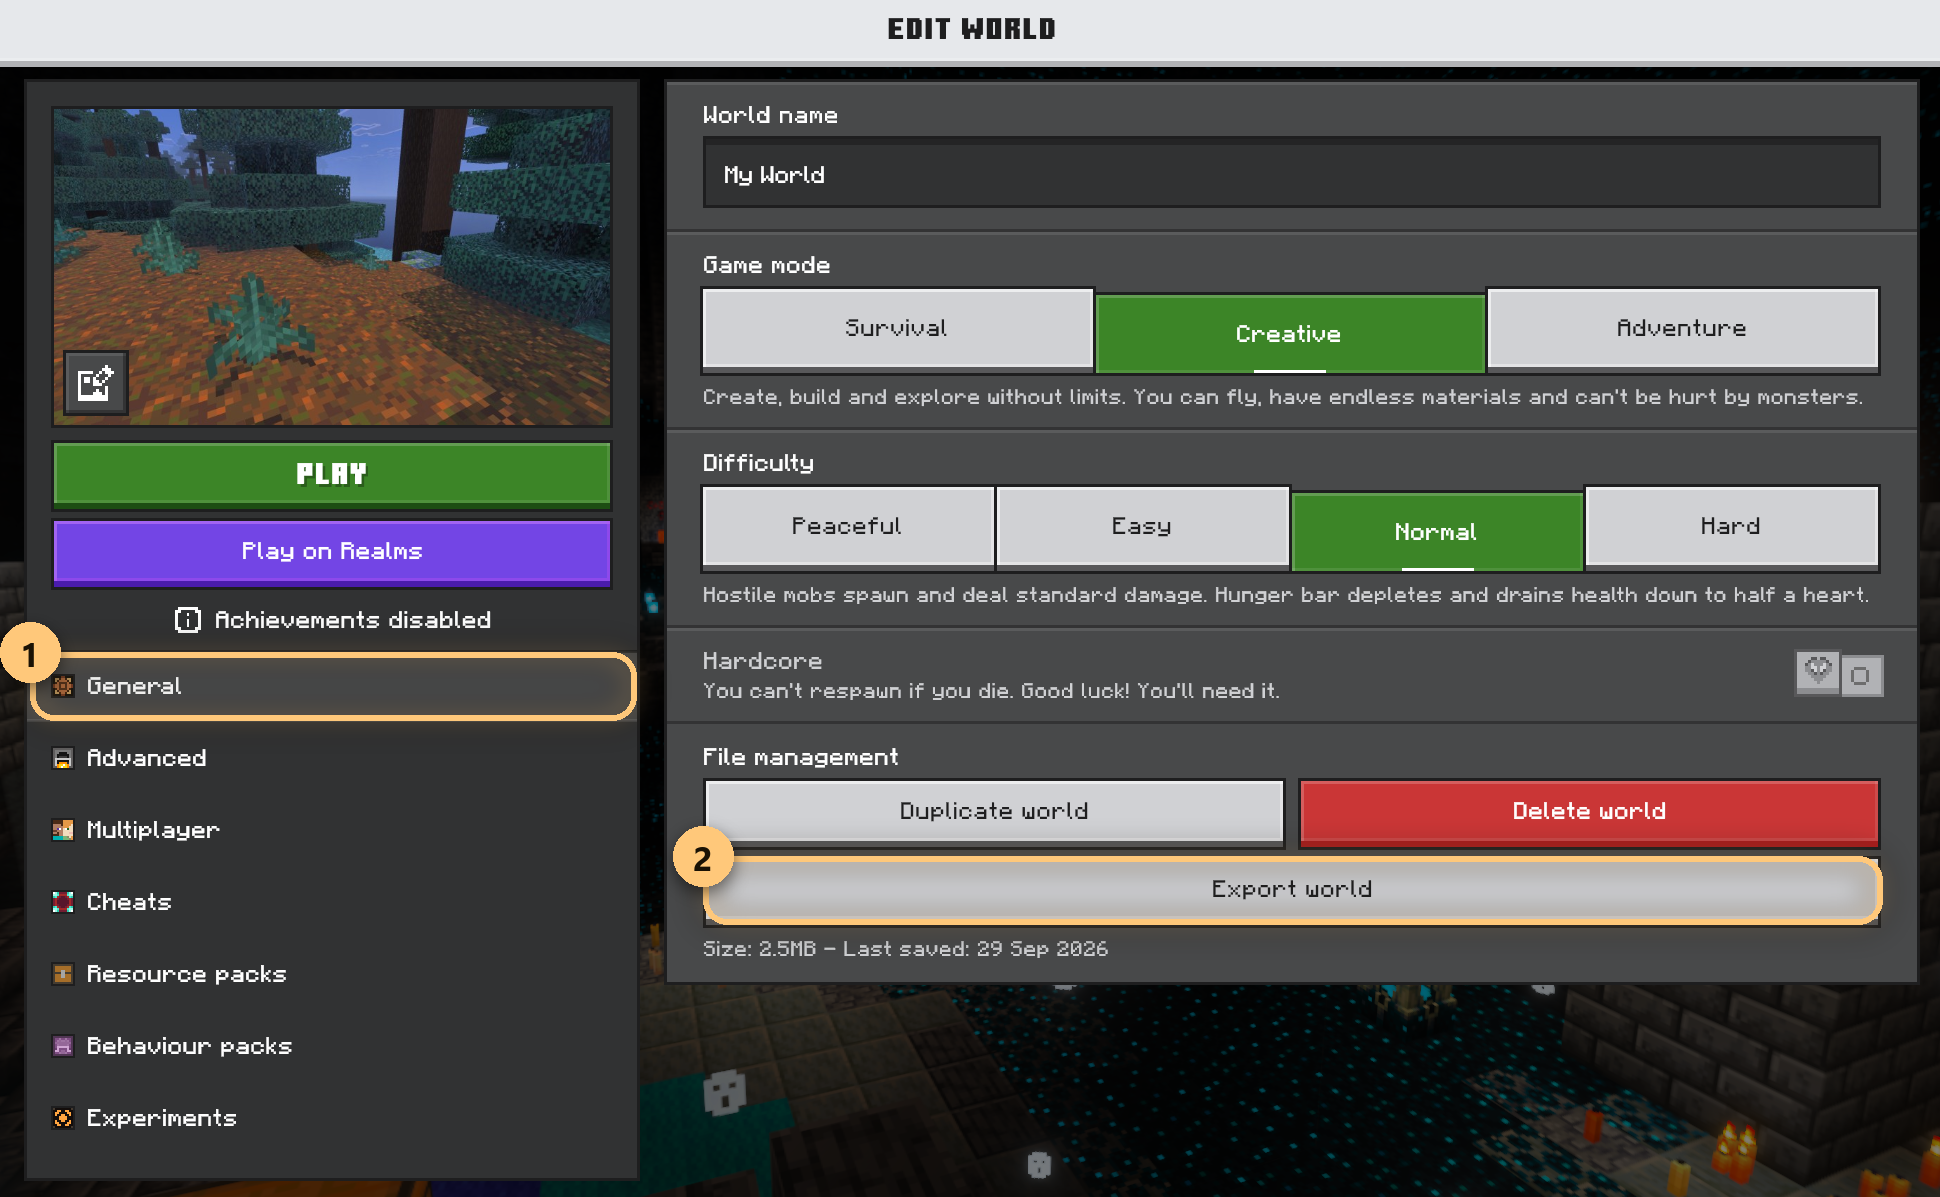
- In Minecraft, go to Play and choose the pencil (Edit) next to your world.
- In General, under File management, choose Export world.
- Save the
.mcworldfile somewhere you can find it.
Bedrock, on a phone or tablet
Minecraft on iPhone, iPad and Android has no Export world button, so the world's folder is zipped instead. You can upload the zip straight from your phone.
iPhone and iPad
- Open the Files app, then On My iPhone (or On My iPad) › Minecraft › games › com.mojang › minecraftWorlds.
- Each world is a folder with a jumbled name. Open one and look at its
levelname.txtto find yours. - Press and hold the world's folder and choose Compress. A
.zipappears beside it, ready to upload.
Android
Android keeps Minecraft's files where other apps can't reach them, so the simplest way is to pass the world through a Realm: upload it to a Realm from your phone, then download the Realm on a computer or iPhone (below) and get the file there. If your file manager can open Android/data/com.mojang.minecraftpe/files/games/com.mojang/minecraftWorlds, you can zip the world's folder there instead, as on an iPhone.
Xbox, PlayStation or Switch
Consoles can't save a world as a file. Upload it to a Realm from the console, then download the Realm on a computer, iPhone or iPad (below) and get the file there.
A Realm
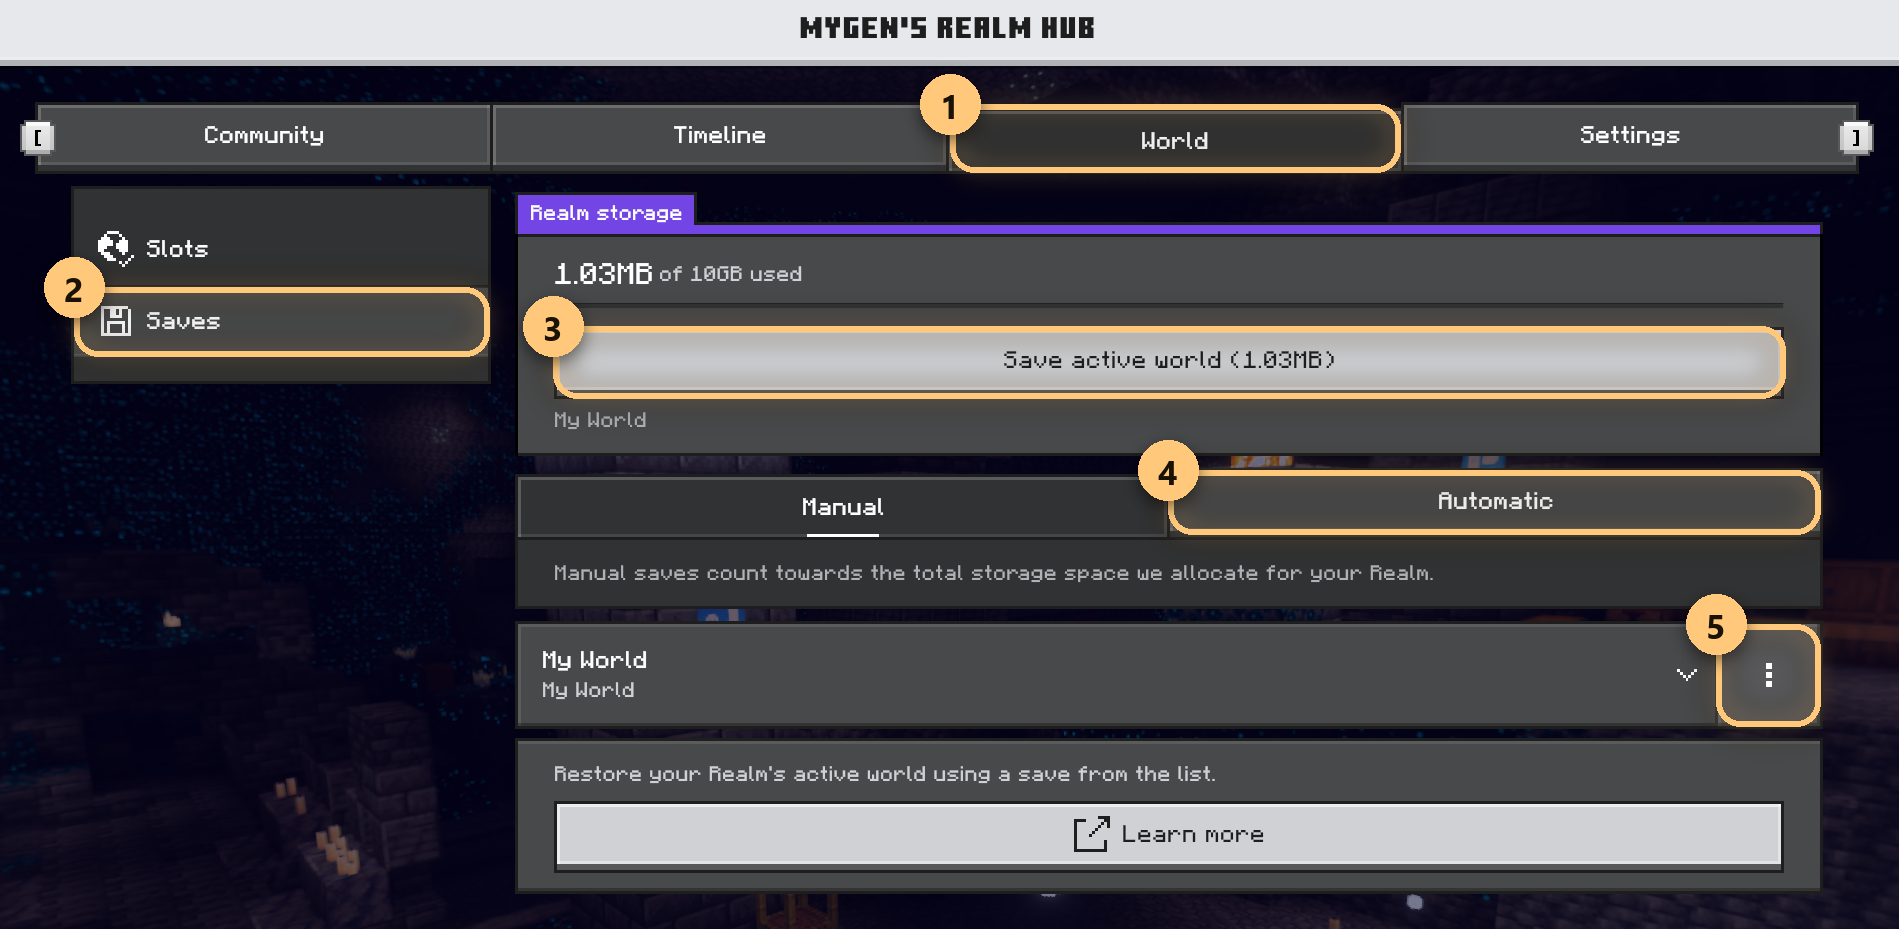
- In Minecraft, open your Realm's Realm Hub, then World › Saves.
- Choose Save active world to save it as it is now, or open Automatic for the Realm's own backups.
- Download the save from its menu (⋮). It's copied into your own worlds.
- Get the file from that copy, as above for your device.
Using Bedrock Relay? It can send BedrockMap a fresh copy of your Realm on a schedule, so you never export by hand. See Auto-sync.
Java Edition
Zip the world's folder: the one with level.dat in it. On Windows it's in %appdata%\.minecraft\saves; right-click the folder and choose Compress to ZIP file.
A server
Download the world's folder from your host (by SFTP, or the host's file manager), then zip it. For Bedrock Dedicated Server it's inside worlds/; for Java servers it's the folder named in level-name, usually world. On Spigot, Paper or Purpur before 26.1 the Nether and End are saved beside it in world_nether and world_the_end: zip all three together and they become one map. A whole server backup zip works too: if it holds several worlds, the upload window asks which one to map. It's best to take the copy while the server is stopped, or straight after a save.
Uploading it
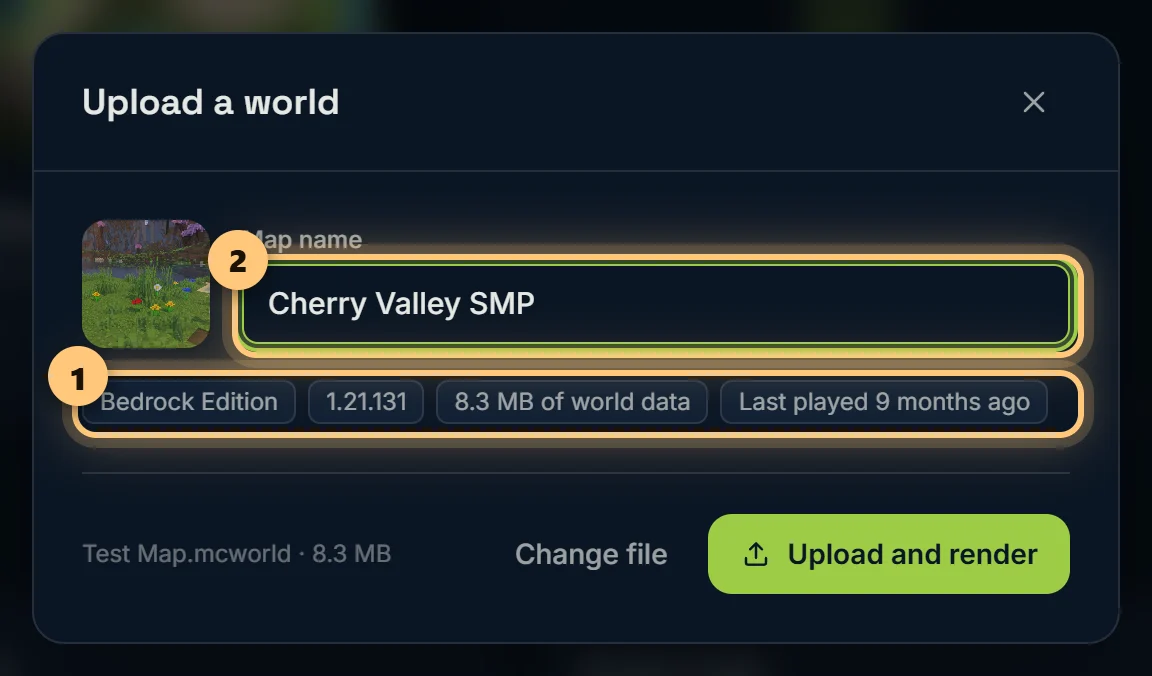
On your dashboard, choose Upload a world and drop the file in, or click to choose it. Give the map a name; it's what visitors see at the top of the map, and you can change it later.
- Big worlds are fine. Uploads go up in pieces and carry on after a dropped connection. Free uploads can be up to 5 GB, Premium up to 20 GB.
- You can keep using the site while it uploads: the progress follows you in the corner.
- Before anything is rendered, BedrockMap checks the file really is a world, and tells you plainly if it isn't. See My upload was refused.
Uploading a newer copy
To update a map, upload the world again and choose the map it belongs to. Your settings, markers and address stay as they are, and the map is rendered from the new copy. (With auto-sync, a copy that hasn't changed since the last one is noticed and skipped, without using a render.)
With the timeline on, the old render is kept as a snapshot, so visitors can compare.
Ready to make a map, or need to change something?
Open your dashboard